I’m pleased to announce that my project, Peripherals: Paintings of Visual Impairment, has been awarded a grant from the Ontario Arts Council! Funding from this grant will go toward supplies needed to complete a full body of work that I hope to complete by end of Summer 2018.
Peripherals will show case paintings of how I see the world through my legally blind eye as well as an artistic interpretation of visual impairment through videography. For more information about this project please read here.
Thank you OAC for your help making this dream a reality!
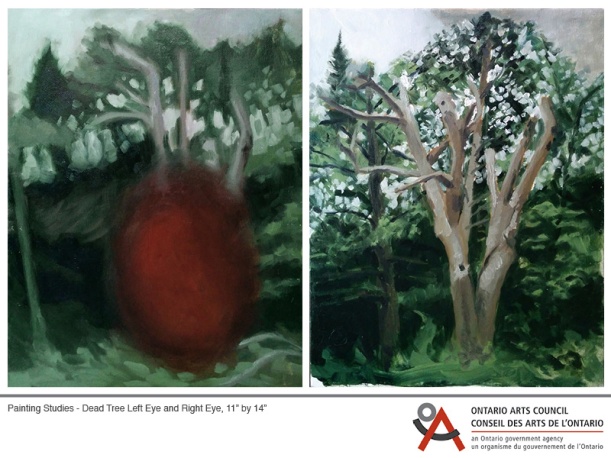
Pictured above is my first painting studies of how I see through my legally blind eye. I painted the same subject, this dead birch tree, so you can see the difference. The right is as I normally see it and the left is with my right eye closed forcing myself to look with only my legally blind eye. The red area is my blind spot. It is normally black but it glows red when my head is turned towards bright light. In this case that light would be the sun behind the cloudy sky.
This is only my first study, I will be doing many more throughout the year in preparation for final paintings. Stay tuned!
I’ve started a new project that is very different from everything I’ve created before! I filmed an announcement about the project that you can see here on my Facebook page or you can read along as I go into deeper detail about the specifics of what my project entails.
Peripherals is the name of the new body of work I am setting out to create! This body of work will be paintings of how I see through my legally blind eye. For those of you who have been following along with this blog off and on for the past 6 years (6 years?!) this is probably news to you. That’s because I can see perfectly fine with my one good eye, with a pair of glasses for its nearsightedness, so it didn’t seem necessary to mention it before.
If that’s the case then why am I suddenly deciding to do this project? Well, in the past few years I’ve been listening to the stories of a family member who is currently in the process of going completely blind. I’ve learned about their emotional and social challenges that they have been going through due to their significant loss of sight. Not only that but the harassment they face on a regular basis from the public simply because they cannot see well. The harassment seems to be worse when people find out that they are not completely blind. They told me they wished they could show people exactly what they were seeing so people could understand what they were going through and stop bothering them. (In another post I will go into detail about what exactly I mean by “bothering” and “harassment”). Because of their stories I realized I was in the right position to do exactly that, show people what visual impairment looks like. I cannot show you that family member’s legal blindness but I can you show mine.
This is how I’m going to do it!
I’m going to paint exactly what I’m seeing through my legally blind eye. To do that, I need to look at my subject with my good eye closed. I look with my bad eye and make a mental note of what I’m seeing. Then, I will paint what I saw with my good eye. If you were to watch me, the whole process would look ridiculous. I will closing my good eye over and over again, as if I am winking at my canvas.
Now to try to be as accurate as possible I need to paint from life and not from photographs. This means I won’t be taking old paintings and painting black spots on it to show an approximation of how it looks. There are so many approximations all over the internet and in text books with artists and scientists showing images of what tunnel vision or blind spots may look like. I’m going to show you exactly how I see!
Here’s the nitty gritty!
If I’m only going to be painting from life and not from photos that means I will be painting scenes of my apartment/studio, my friends, myself and of my city. As you’ve seen with my previous work I mostly paint from photographic reference. Although, I have painted from life many times before, but mostly of models during life drawing, or of still lifes in my studio. I haven’t done any En Plein Air (Painting outside) and unless I want my whole body of work to be just set in my apartment, I need to get comfortable painting outside. In public!
The break down is as follows.
Over the next few weeks I will be carting my supplies to various spots in the city and painting. I will not be painting my view from my bad eye, as of yet. First I want to get comfortable painting outside. What’s the difference between outside and inside? Time. Inside, I can control the light source. Outside, the sun is my light source and it moves, so I really only have an hour to get my composition and colours just right and then another hour or two to work on the details based on my initial composition. Or so I think, I haven’t really done this before :P
As I’m practicing I will also be “Scouting” out good spots and working on possible compositions. So there will end up being a lot of paintings of the same areas. From these studies I will decide what subjects I want to focus on.
Then, In the next month or so when I’ve become somewhat more comfortable with painting outside, I will start painting my favourite locations as I see them with my bad eye. On days that it’s raining I will work on compositions from inside my apartment/studio.
Don’t worry, because it’s been raining a lot up here in London, Ontario, I suspect you’ll see some “blind eye” paintings from my apartment really soon.
After I’ve collected enough En Plein Air studies that I am happy with, I will take them into the studio and repaint them on larger canvases. The paintings inside my apartment can probably start right away on large canvases once I’ve decided on subject and composition.
There is also the option of taking a larger canvas to a location on multiple days until it is completed. I just need to go to that location at the same time each day I go, so the lighting is correct. We will see as I go along which option will work best. I have a lot to learn!
I’m trying to paint as much as I can right now because there are only a couple of months before summer is over, then a couple of months before the weather gets really bad and I’m forced to stay inside. So, for the first little while, expect a lot of En Plein Air paintings!
During the month of August I will also be spending a week doing research on what it’s like living as a legally blind person. I will talk more about that as we get closer to that time.
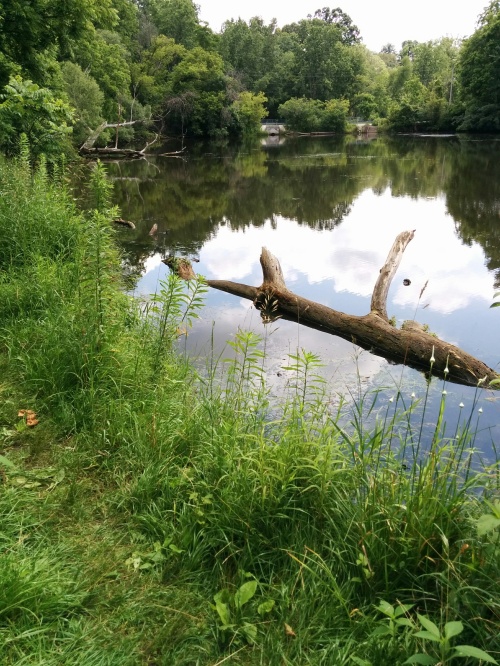
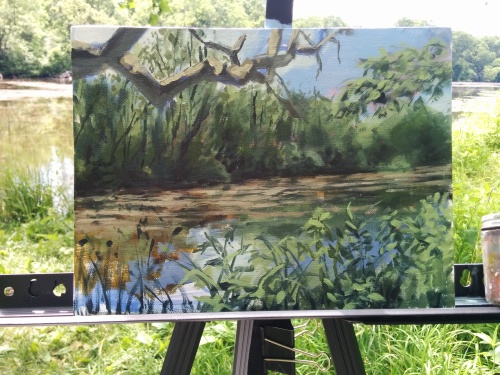
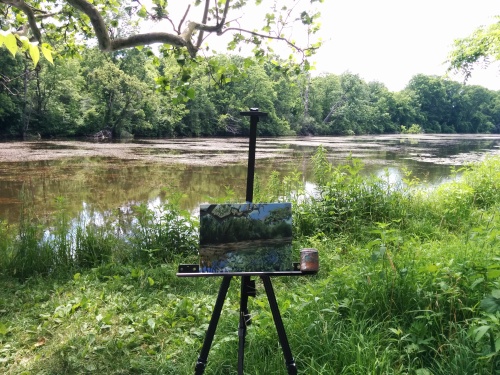
Phew, I haven’t written a post this long in a while! I’ve already done a couple of days of En Plein Air painting so here are some pics of how they turned out! Please comment with any questions you may have or just comments on what you think of my project. Thanks!
I’m a bit of a stationary nerd and lately I’ve been drooling over Traveler’s Notebooks and Bullet Journal spreads and I decided to make my own. This notebook combines everything I love about the customizability of Traveller’s Notebooks with the all in one functionality of bullet journaling.
Prior to this, I was using a tiny agenda to keep track of dates, a Field Notes notebook to list tasks for the day and a large Moleskin cashier notebook for brainstorming. I used to use a medium sized hardcover Moleskin adgenda for dates and tasks but I hated bringing around another big notebook for brainstorming ontop of that, hence why I went with the smaller options. I also have another notebook in my room where I attempted to write down dreams and daily affirmations, but that didn’t last. I missed doing that but I can’t combine it with my current system. That would be four notebooks to carry around! Bullet journalling was the answer, but I didn’t like any of the notebooks I have on hand. Luckily, I have a lot of paper supplies, so I made a notebook with everything I wanted!
Tada!
Before we open it up let’s go through the supplies I used to make this beauty. Starting from the top left hand corner:
Steel Ruler – Rhodia Dot Grid Paper – Bulldog Clip – Decorative Twine – Double Sided Tape – Washi Tape – Small Cutting Board – Cardboard – Decorative Paper – Small Envelopes – Blackwing Pencil – Bone Folder – Stapler – Scissors – Cutting Knife (not shown)
Once upon a time, a long time ago, I bought a stationary set. The cover for that set that held in the paper and envelopes I used to make the cover for this book. I simply cut it in half and made a spine out of two pieces of cardboard.
One piece of cardboard holds the covers together and a second more slender piece sits on the outside and secures the strings that keep the pages in place. I lined the outside spine with Washi tape for a cleaner finish.
When we open it up we notice there is red paper on the inside affixed to a larger piece of cardboard that makes the soft stationary holder now a hardcover book.
I know I said I wanted to combine everything but my sketchbook must remain separate. My main sketchbook is larger and I don’t always want to bring it with me which means I sometimes regret not having something to draw in when the urge strikes. So I put a small cashier Moleskin notebook in the front flap. It fits perfectly and I’ll always be ready when inspiration hits!
When you flip the first page which is hard cardboard you find two envelopes and my Index page. Inside one envelope I’m keeping business cards and in the other is my bullet key card.
The next spread is Long Term Projects, a wish list for things I want to buy someday, and the 2017 year calendar at a glance.
The 2017 and 2018 year at a glance continues on the next spread. I’ve always found this very handy in previous agendas so it made sense to add one for myself.
The next spread is my future log. I added a piece of Washi tape to the edge of the page so I can access it quickly. Here I made another calendar for each month where I highlight the days I run and total up the Kms at the end of the week. My running monthly goal is underneath as well as my cross training goal. After that I list off the important dates.
After the future log you’ll find a splash page for the month. I saw some bullet journals where people would make a memories page or a mood board so I thought I would do something similar. I might add movie tickets or stickers or doodle as the month goes by. Once again I added a piece of Washi tape to bookmark the page.
The next spread is my monthly log and I got to say that so far I’m not enjoying it. There is a lot of space so I might play around with it next month or leave it as is. I’m sure next month will be busier.
Here is my Daily Log! I write the date and in the morning as briefly as I can I write down any dreams from the night before. Then I write a sentence about what I’m grateful for and a sentence for what I’m excited for that day and then I leave a blank spot for the evening when I write something that happened that made that day great. Under that I list out my tasks and events for the day. Since I am very forgetful I decided to set a daily reminder on my phone that tells me at 8:30am and at 10:30pm to write in my journal.
If you flip through the pages you’ll eventually find the other side of the envelope cardboard that holds more tiny envelopes! I don’t have anything in them yet but I’m sure I’ll find something.
I also used this adorable squirrel paperclip to use on the top of the page I’m currently writing in. I forgot to add a bookmark string to the spine when I was tying in the books of paper but I think I like this better. It’s too cute.
Each book of paper has 10 spreads which makes 40 pages that I stapled together at their spine. Then using inspiration from Travellers Notebooks, I used gold string that is affixed to the inside of the spine of the cover to tightly tie the book in place.
By doing this I could slip the booklets out and add more later if I wanted to. I think I won’t though because I had so much fun making this, I would probably just make another one.
I made 5 booklets with 40 pages each, so that works out to 200 pages. I hope that’s enough for the year!
Here’s the back page! With a couple sheets of scrap paper, just in case.
Thanks for following along with me! I think I’ve made a journal that is simple enough to combine all my scheduling and journaling needs with all my favourite beautiful stationary details that keep me organized and excited to open it up everyday.
I have a confession to make. I do not enjoy life drawing. GASP
And why should I? It’s difficult, the chairs are uncomfortable, the poses are difficult or sometimes just aweful and uninspiring. But I keep going because it’s good practice, to try and figure out the human body in 1 min to 30 hour intervals. The practice I get here I use in all my paintings and especially portraits. So I’ll keep on grumbling with sketchbook and pen in hand and continue to attend life drawing. Do you enjoy going?
At life drawing on Monday (I’m going to try and make that a weekly thing) I found the worst spot to sit in. I had no idea until it was too late. The room filled up with easles and benches with their respected artists. The model got ready and the host turned on the light and that’s when I realised I was sitting right in the path of the spot light. At first your like nah it’s okay I can handle this but as the time goes by you pretty much start to go blind. So I gave up cause the drawings were terrible anyway since I could only look at the model for a moment. I ended up drawing the artists, blind contours style. After the break it’s long poses and the room usually clears out a bit so I got to move, yay. Not a completely wasted night.
All poses 20 mins each and with blue ballpoint pen.
I have a few things going on at the moment. Primarily I focus on painting obviously but that doesn’t seem to satisfy all my creative needs.
I found myself doing a lot of tight pen drawings for no reason and they weren’t half bad. I decided to create a print shop just to show case those drawings.
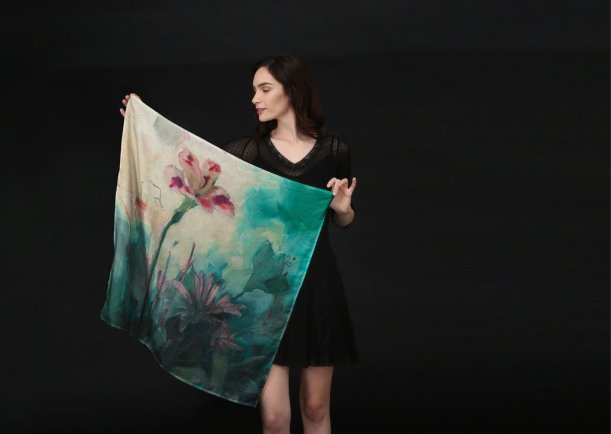
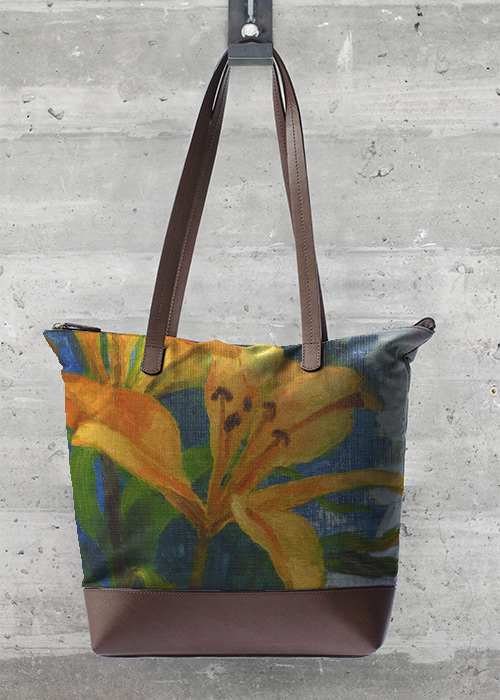
As for painting, my favourite subject to practice with is florals. A fashion website approached me and asked me to join their community of artists so I put those florals to good use.
Here is a sample of what you can find on my Society 6.
Here is a sample of what you can find on my Shop Vida.
The bags are brand new to the site, I’m really excited about these since I’m such a hand bag freak haha.
Don’t forget I’m always available for painting commissions! Email me anytime.
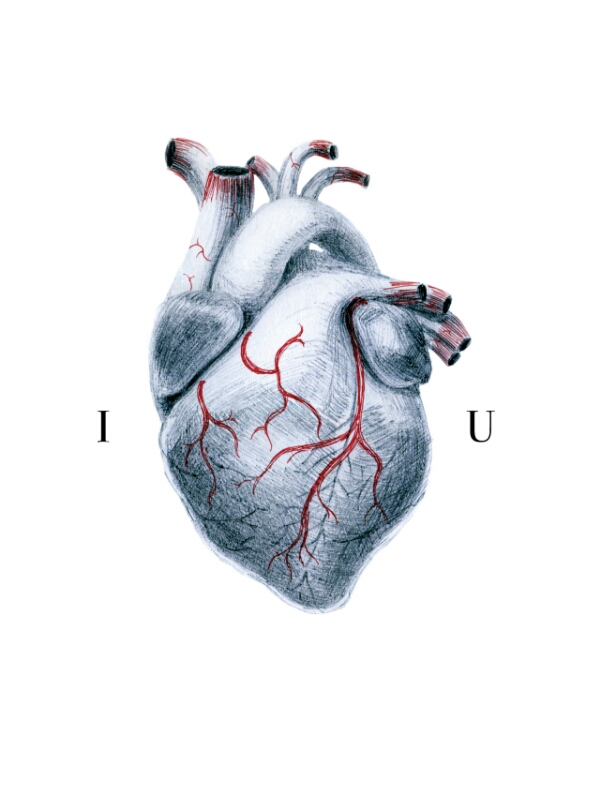
Really I do, all of my long time subscribers and new ones too! Thanks for reading, commenting and overall just supporting me through this mess of a blog. I hope everyone has some love today whether it be from your significant other, crush, a loved one or just a random person telling you they appreciate you and all that you do. Cause I certainly do!
Happy Valentines Day!
P.S. You can purchase this print here… #shamelesslyadvertising #always
Two weeks ago I left Toronto to move in with my long time Boyfriend in the city of London ON. I now live in a sunny apartment where my studio is not in the same room as my bed or couch or kitchen table. Every artists dream! I will also be working on art full time! So I guess I’ve leveled up in the game of life, ha.
Painting will come back REAL soon but in the meantime I have some life drawings from last Monday. I haven’t gone to life drawing in maybe 2 years? Please excuse the rustiness.
I’m very excited and a little nervous to show you my new work for this upcoming show, In The Round 4 at Graven Feather Gallery. This is my first attempt at a sculptural piece. I’m satisfied with how they turned out so I’m positive I’ll be making some more in the future.
My “What a Hot Mess!” Series is my commentary on how toxic our judgements are on other people’s appearances (as well as our own) especially when it is expected that one’s personal identity should reflect in their personal style and aesthetic.
Please check out the show opening if you’re in Toronto next Thursday November 3rd at 7pm at Graven Feather Gallery beside Trinity Bellwood’s Park. This is a group show so there will be over 100 “rounds” on display! There will be something for everyone and for a low price of $65!
“What a Hot Mess!” 1 of 3 Oil paint, glass and hot glue on wood panel.
“What a Hot Mess!” 2 of 3 Oil paint, glass and hot glue on wood panel.
“What a Hot Mess!” 3 of 3 Oil paint, glass and hot glue on wood panel.
Here are a couple progress pictures.
First you paint the glass. I could of just painted lines straight down and called them stripes but I wanted to be authentic even if I was only me who would know that it was stripes from a blouse, folds and all. It was important that I painted actual fabric patterns on each pane of glass, from my own closet no less.
Then you break the glass. What followed was hours and hours and hours of sanding down sharp edges while watching Netflix. I only got glass in me twice. Haha
Leave a comment on what you think of my new direction! Don’t worry though I’m still painting ;)